

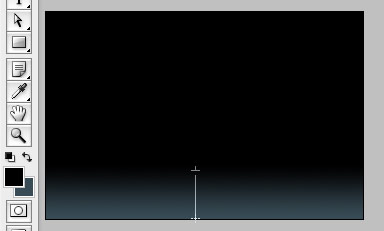
1. Gradient background
In Photoshop, create a new document, 950 x 620px. Select black foreground color and dark grey (#384b55) background. Use Gradient tool and drag from lower-middle to the bottom of the document.
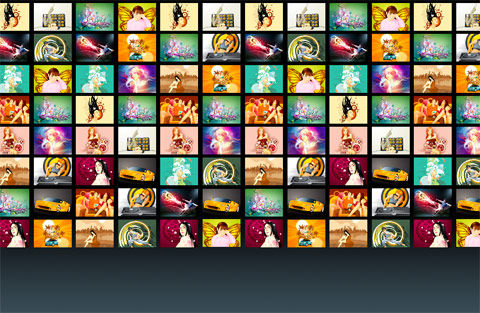
2. Thumbnail grid
Collect some sample photos and create a thumbnail grid as shown below:
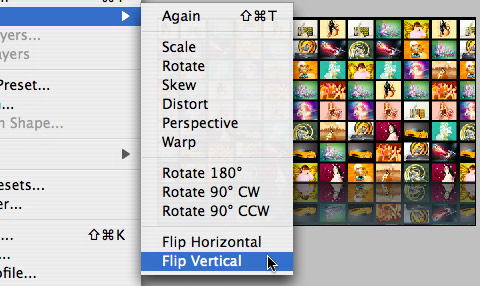
Then duplicate the thumbnail grid and apply flip vertical transform (Edit > Transform > Flip Vertical). We will need this duplicated grid to create the reflection effect.
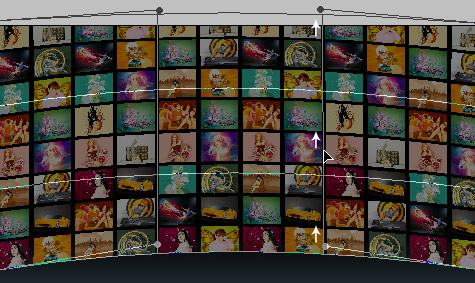
3. Warp transform
Select the top layer grid and go to Edit > Transform > Warp. Now you should see the Warp transform grid:
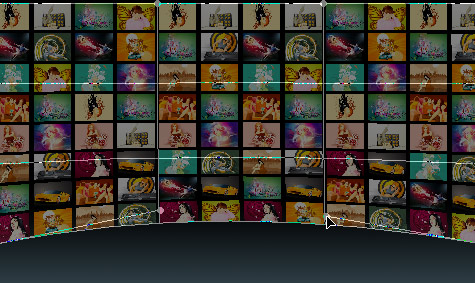
Drag the four corner anchor points and the two middle vertical lines slight upward to create the bent effect.
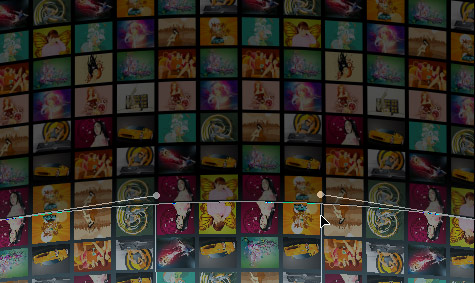
Repeat previous step for the reflected grid. While you are dragging the anchor points, try to keep the reflected grid align to the top layer.
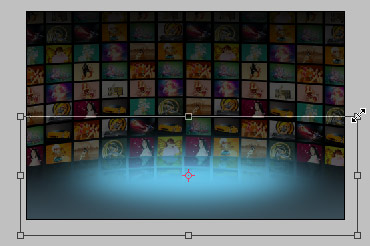
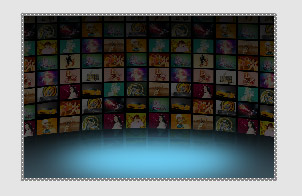
Set the top layer opacity to 30% and bottom layer to 50%. Then apply a gradient layer mask to the bottom layer.

4. Glow
Make a oval selection and fill it with a sky blue color. Apply 50px Gaussian Blur (Filter > Blur > Gaussian Blur). Condense it a little so it looks like a spot light.
5. Flash
In Flash, create a new document exact same size as the Photoshop image. Copy & paste entire image in the first layer.
6. Flash component
If you have the photoFlow component installed, simply drag the component onto the stage. If you don’t have the component, get one from Flashloaded or enter our Free photoFlow Component Giveaways contest.
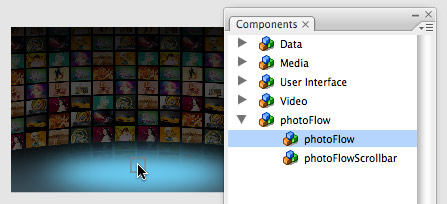
Now open the Component Inspector palette and you will see all available parameters. Here you can customize the component setting such as: XML path, autoflip, image dimensions, reflection, zoom effects… For more information on how to use photoFlow, please read the user guide.

6. Updating the gallery
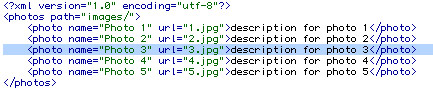
Since the gallery is loaded from an external XML file, you can simply update the XML file to add or remove photos.
Thanks to webdesignerwall.com for this great tutorial!!


0 comments:
Post a Comment